Monday, June 27, 2011

a steve chuck update

back in may i posted about a photo studio in Asbury Park that asked some friends and i to pose for some free portraits so they could practice on us and help get some shutter time under their belt since they were a newly opened business.

yesterday Tamara and i were wondering around the Asbury boardwalk and happened in to a store selling picture frames among other things.


we found one frame with a particularly interesting demo photo.


I'm that random, anonymous guy in a new picture frame!!!

Always remember, nothing in this world is free.
The portrait actually cost us our souls as we have now become unwitting tools of the capitalist machine... OK maybe we are just TOOLS.

Wednesday, June 22, 2011

Rendezvous 2011

This past weekend was the annual Citroen Rendezvous in Saratoga Springs, NY. An amazing event organized by amazing people.

In preparation for the event Tamara and I made some Citroen soaps and shipped them up to the Springs Motel and asked the owner to sneak the bars in to rooms before the guests arrived. We also made a couple hundred extras to sell at the event, we sold out in no time and donated the proceeds to Drive She Said.

the molds
soap molds
the soaps
soap
some close ups
ami soap
truckette soap
2cv soap
the labels
soap label
the sales table
soap

Tam and i brought along our parents it was a great weekend with both friends and family. We borrowed Kim's Ami8 so the Ami6 would have company on the drive up. The 8 was piloted by a first time citroen driver (my mother) and the two are now best friends.
bff

I'm going to go ahead and say it... these are the two greatest cars that were in attendance.
the two greatest car at the showI'd say third place was a tie between Greg Long's Red DS cabriolet and Carter's 1955 truckette, i saw Greg's car last year and although i recognized it's beauty i didn't quite  appreciate it as much as i did this year SINCE GREG LET ME DRIVE IT!!!
two beauties

The Longs are apparently  a family that appreciates esoteric automobilia, Greg's brother John brought an amazing Bowlus trailer. Here's a link to John's site about Bowlus trailers.
yes
My favorite detail on the trailer is the handle on the back, someone would stand on the rear bumper and hang on to the handle to help move the weight (a massive 1100lbs.)around as you were trying to mount the hitch.

I guess the rest of these cars didn't suck too much.
big and little
ds break with awesome blinds
traction lineup
ds lineup
peugeot
sm lineup
visa

look at all these amis
friends

the rest of my photos can be seen here

Monday, June 13, 2011

one thing that i can depend on

SOUND SYSTEM!!!

Since the original door cards in the Ami had already been cut for speakers and i like music...
i decided i needed to install an absurd system.

Radio
Radio
data
custom head unit
view from the back

I custom built the "head unit" to run and charge an ipod, there is a standard ipod cable wired to the car battery with rca line outs. the line outs are split to 3 line level control knobs to control my front and rear channels along with a subwoofer. all five speakers are coming from a single 5 channel kenwood amp with crossover control. My front speakers are a set of 5.5" kenwood components with an in-line high pass filter. In the rear is a pair of kenwood 3 way 4x10" speakers and in the trunk is a pioneer 10" subwoofer in an enclosed box with the amp and a capacitor mounted on it. By using this speaker configuration and amp along with three separate line level controls i can simulate having basic audio controls. I can adjust the crossovers to send more highs to the front and all the lows to the sub so i can manipulate the  bass and treble controls by adjusting the relative volume of those speakers i get the same fader control to the front and rear channels but what i do not have is a balance adjustment. That's not all that important since the cabin is so narrow. Between these basic controls and the built in eq settings on the ipod i think i am getting very decent audio quality.

I enclosed the line level controls in  a plastic box that i designed and built in solidworks and then printed the part on a dimension 3-d printer in black ABS. I adapted the controls to run correct ami6 knobs along with a proper on/off switch and a later model oil pressure warning light to indicate power on.

drivers door
driver's door
passenger front door
passenger door
view from the front
view of the rear speaker box and subwoofer
rear speakers
chevron details on the ports.
under the back seat
under the back seat
flux capacitor
in the trunk

I am very happy with the project it looks and sounds very clean...it's also very loud.


new ami6 emblem
the new emblem installed

Tuesday, May 24, 2011

making a bunch of stuff

we'll start with making faces
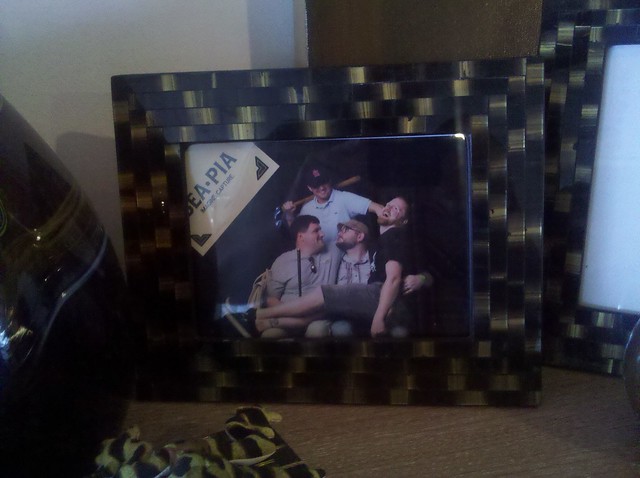
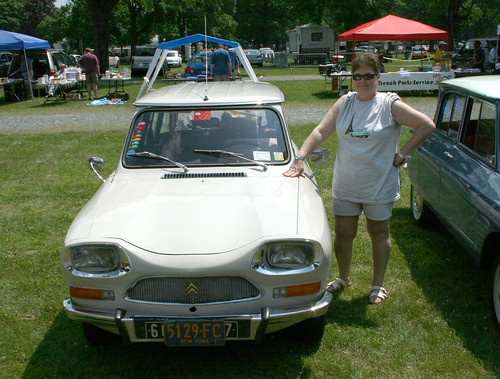
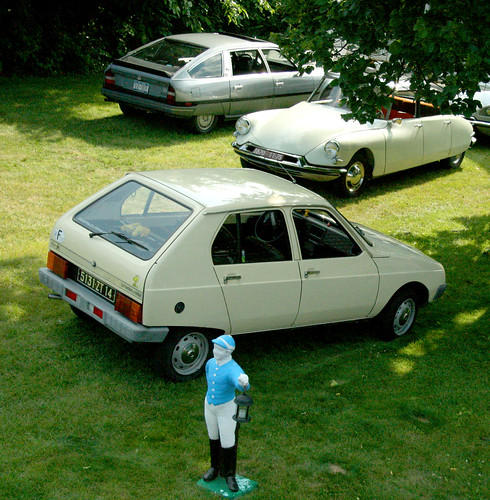
this past weekend Tam and I along with our good friend and neighbor Mr. David Balls hopped in the beetle and drove to asbury park to meet some friends for a day of pinball, booze and beach. At one point Tamara and Ro sat down on a bench to watch a wedding in progress on the beach, while standing around looking like a bunch of creeps the boys and i were asked by a local entrepreneur if we would like to have our portraits taken...only $15 for all of us. We declined, a few minutes later the offer was made again but this time for free because they were a new business and needed the practice. Here is some of what happened next.
steve chuck has a posse
steve chuckington
If you like their work, you can check out their site here
very nice people, if you ever find yourself drunk in asbury park and in desperate need of portraits, i highly recommend them.

so aside from being a goof i have also been 
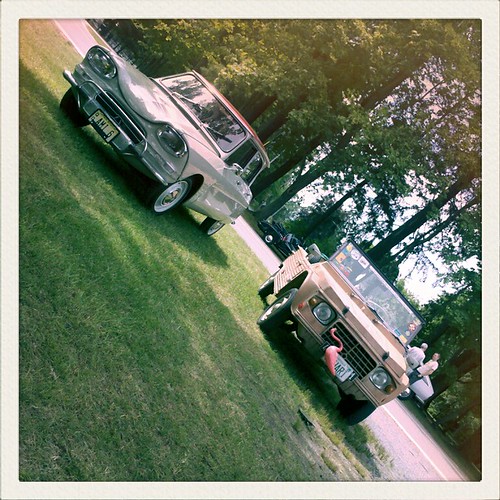
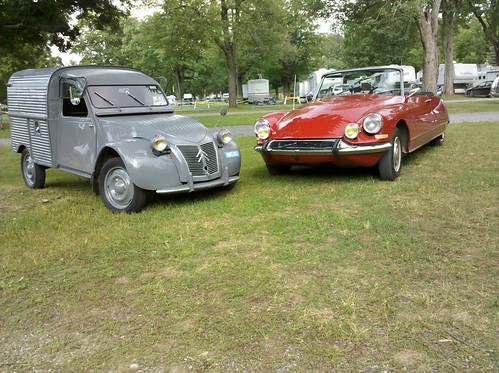
making a lot of stuff for the Ami6.
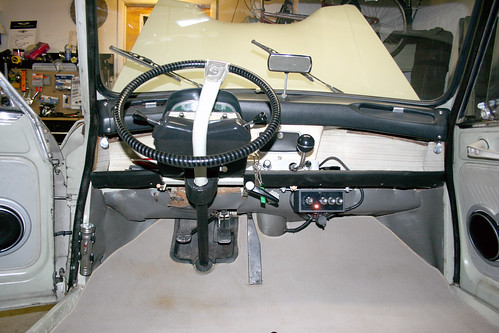
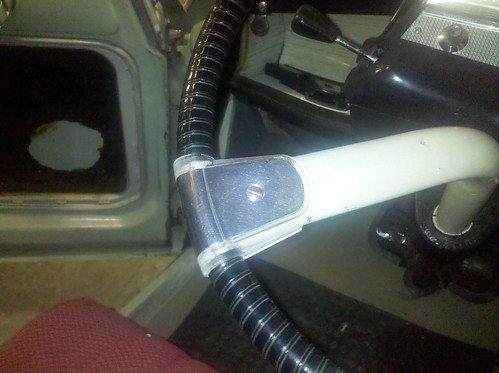
steering wheel

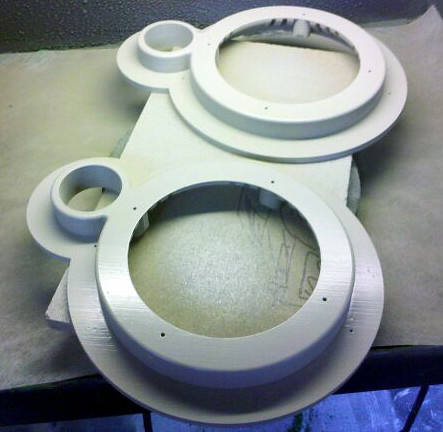
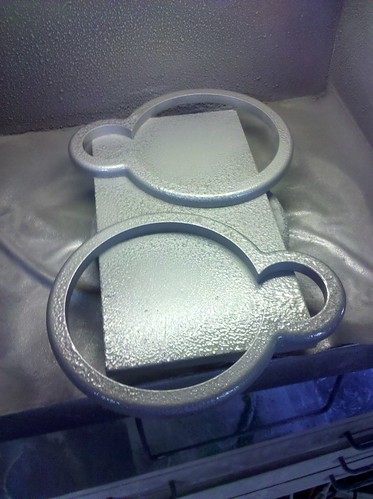
there is a plastic saddle covering the joint between the steering wheel and the central spoke. I guess after 45 years the plastic has become very brittle and started deteriorating. I decided to take a bunch of measurements and rebuild the part in solidworks before it was too far gone to copy.
Rebuilding the thing
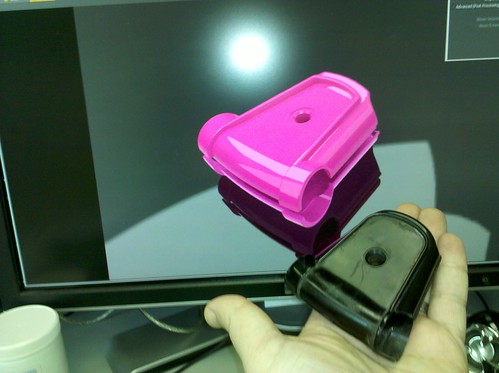
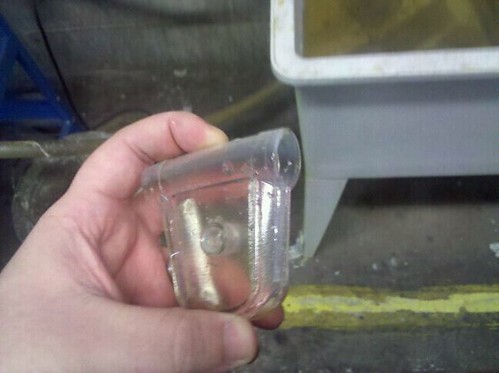
then i used a 3-d printer to make a quick prototype to test fit
First prototype of the thing
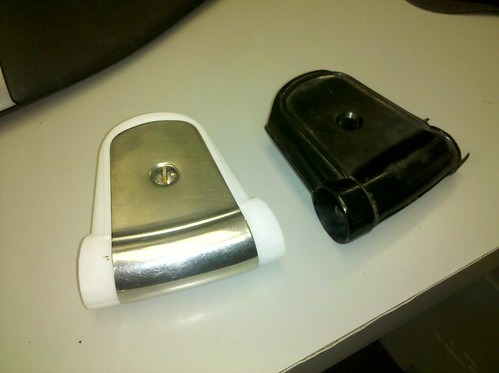
the fit wasn't perfect so i made a few changes and printed another prototype on a higher resolution printer.
Prototype two

installed
Looks awesome fits gooder but not goodest yet
only thing left to do is decide whether it's worth building a mold to cast it in black resin or just paint the prototype and roll with it.
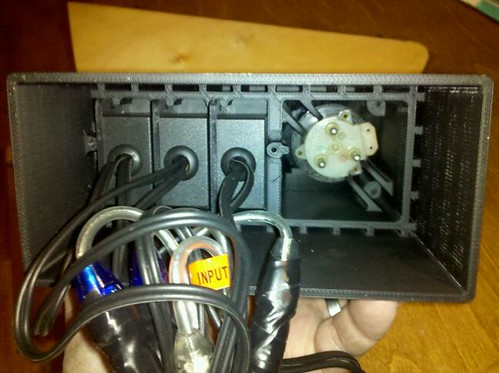
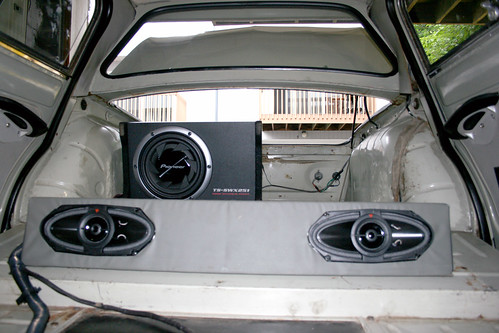

Speakers

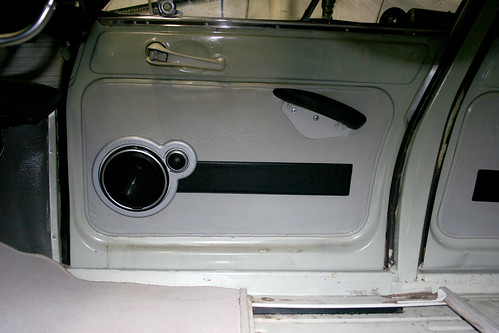
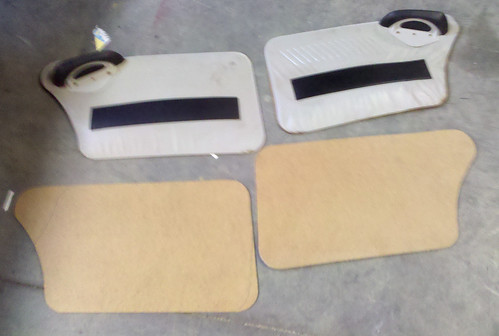
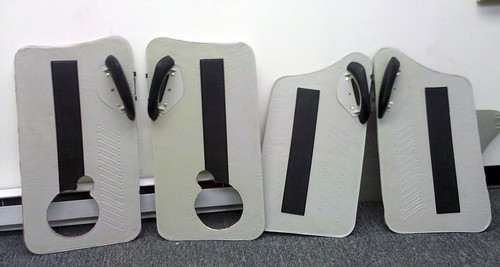
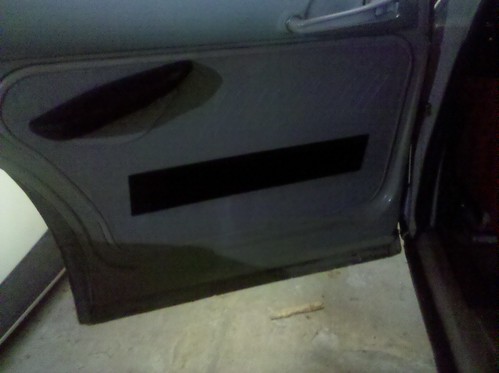
in the last photo you might notice a missing door panel and a hole in the vapor barrier.
there are two reasons for this. the door cards were shot, the vinyl was de-laminating and the board was completely warped along with the fact that one of the previous owners of this car had added a single speaker grille to the drivers side door... no speaker, the card was never cut but the vapor barrier and the exterior vinyl  were cut?

this is an image from an article in citromania in 2002 that featured my car
IMG_20110515_191341
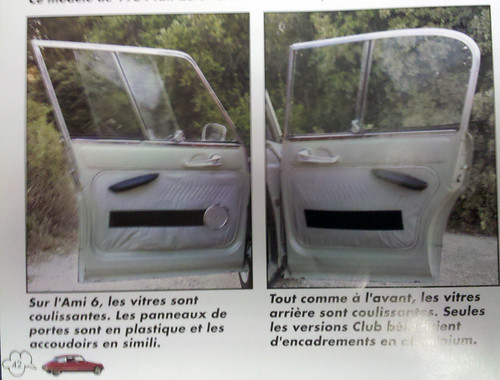
you can see that even 9 years ago the door cards were deteriorating heavily.

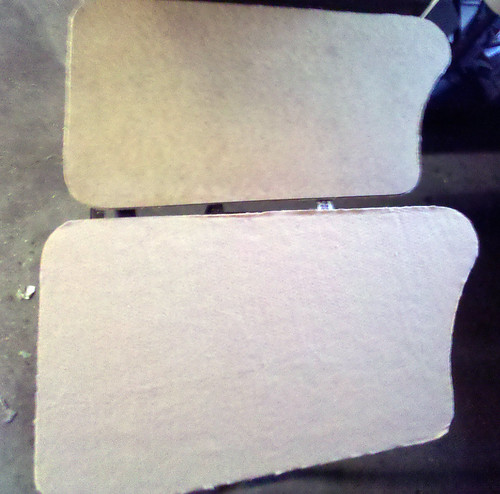
i started by copying the profile on to new card material and cutting it out.
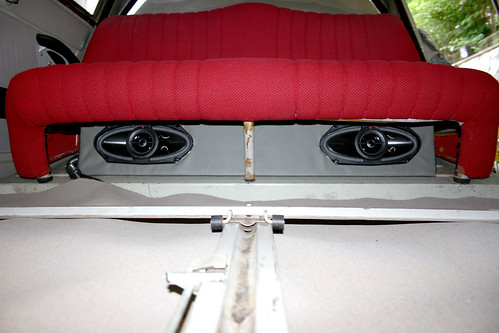
for the rear i tried to stay original and used proper materials. for the front i knew i needed to do something to hide the hole in the vinyl that was made for the speaker grill. Why not ad actual functioning speakers? I used styrene sheet in the front to support the extra weight of the speakers and avoid warping again.

new door cards

this is what the back of the vinyl looks like when separated from the board.
door card clean up
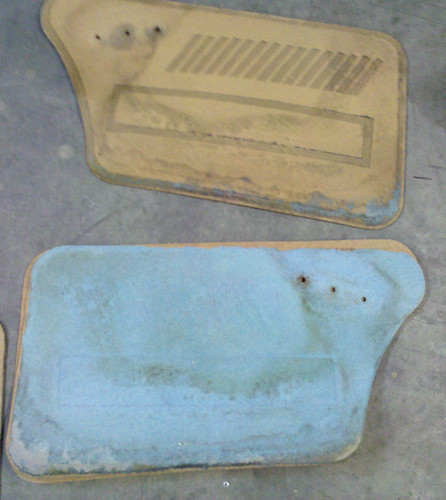
i peeled away the felt backing and then used a light grit sandpaper to clean the edges where the felt was heat sealed to the vinyl.
door card cleanup
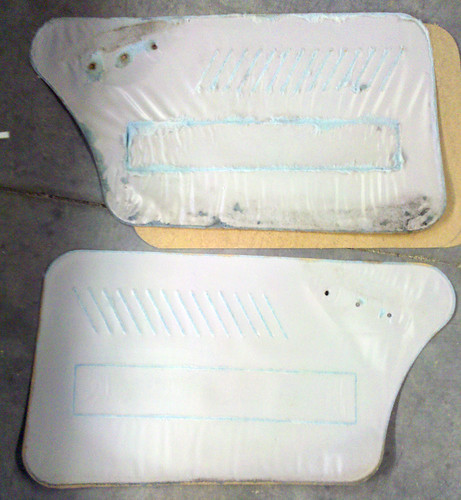
then a new layer of felt is glued in place with spray adhesive
door cards with felt
and the vinyl is remounted the same as the felt, i heated the vinyl with a heat gun and stretched it as i laid it down, this combined with the thick layer of felt helped to eliminate wrinkles in the vinyl from years of stretching and warping. The rear panels came out much better than the front, the front seemed to be in worse shape and it was much harder to work out all of the wrinkles.
door cards
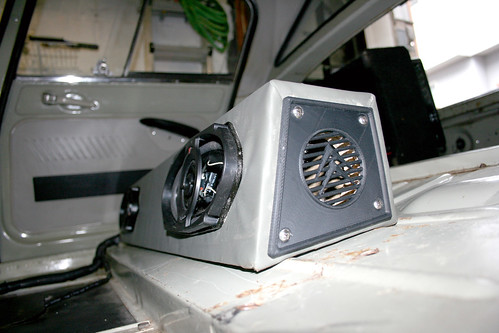
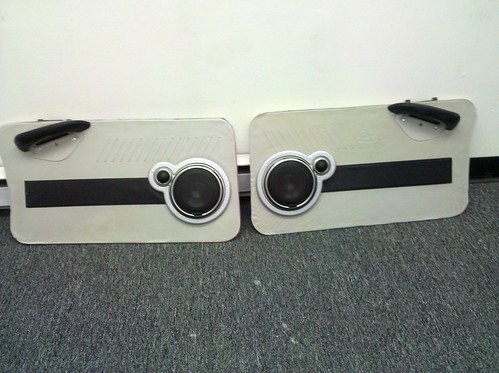
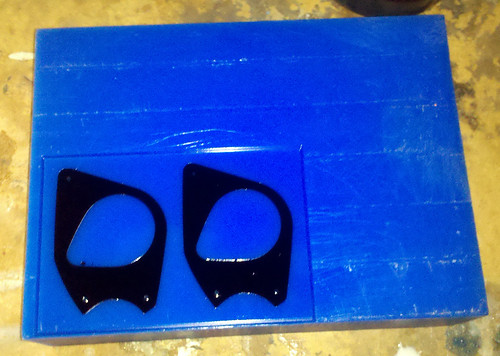
I built some plastic speaker inserts to house a new set of 5.5" kenwood components.
hit the inserts with a little gris rose paint
speaker mounts 
hit the trim rings with some hammered steel paint
Speaker insert trim ring 
and the final product 
Speakers
 a bad photo of one of the rear cards reinstalled
Drivers rear reinstalled
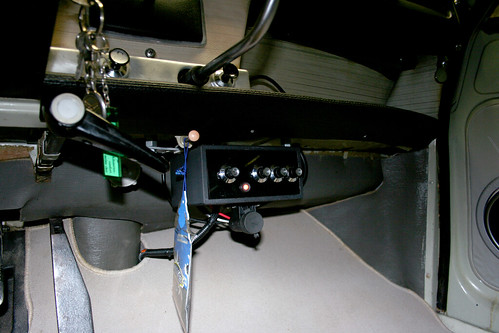
I'll document the entire interior once the rest of the stereo system is in place.

Old Business
next i tackled something that has been bugging me for a while.
in an earlier post i documented my homebrew hackjob replacement of a broken coil mount.
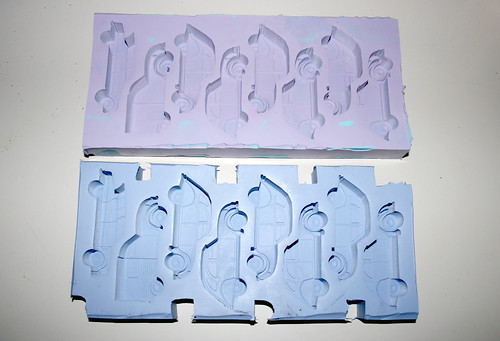
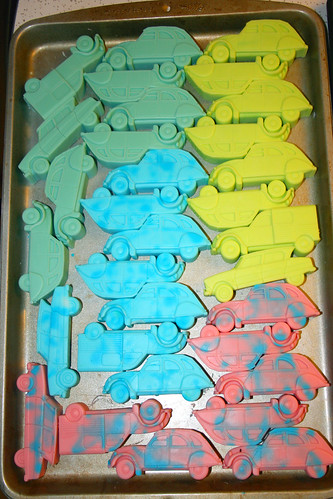
i finally got around to making a proper mold and casting some clean parts.
coil mount first cast

New Business
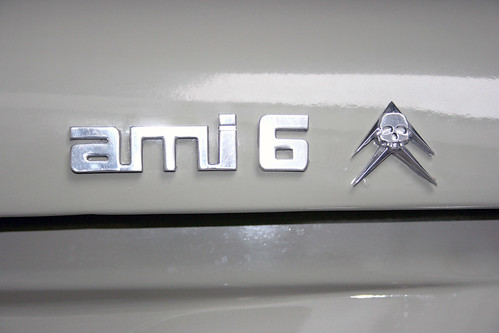
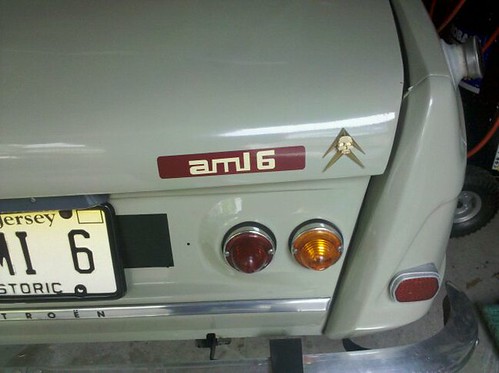
 there is a sticker on the back of my car instead of a proper emblem.
Ami skull
that just won't do...
so i fired up my tiny milling machine and threw in a chunk of aluminum
and this is what it spit out
Ami 6
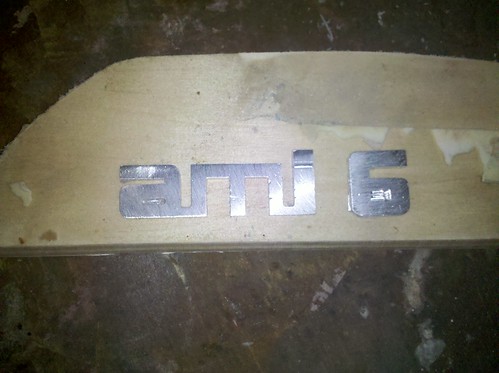
and after a little polishing
new emblem
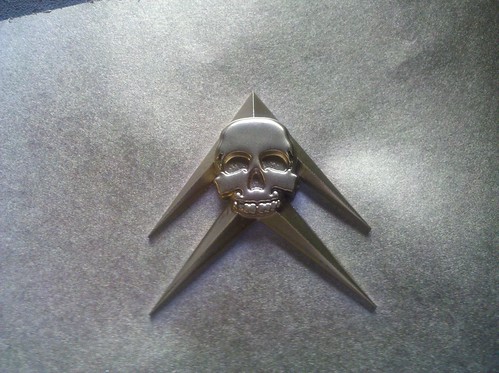
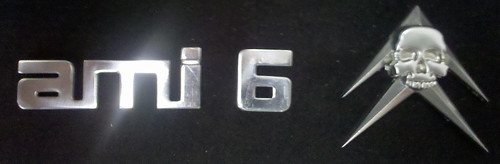
and the skull chevrons are a little something else i am working on
Citroen pirates